Showing posts with label house. Show all posts

Wednesday, July 4, 2012

Decorating (and Living) with Guts

I love changing things around in my house. Always have. Even as a kid, I loved to decorate. I still remember most of my bedrooms (and there were a lot).

 
Remember when this house was amazing.
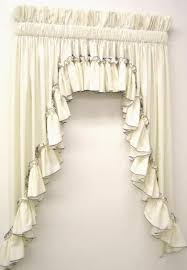
My 80s bedroom had a matching country blue comforter set complete with a ruffled pillowcase and ruffled curtains that framed our white vinyl mini blinds. I even remember buying it. My sister got the pink one, and I wanted the blue. They had other colors, but I liked the blue. My mom even questioned it, "Are you sure you want blue?" The wallpaper was a subtle stripe adorned with peach and country blue roses. I loved my room. It was inspiring... so much that I colored on everything (wallpaper included). 

Similar to my country blue curtain.

Later I wanted something more grown up, which meant bright, matching New Kids On The Block (or NKOTB to their biggest fans) sheets, comforter and curtains. 

This is actually it! I remember tracing their signatures and staring into those black and white faces!

I shared a room with my sister while we lived at my mamaw's house. It had a matching white eyelet comforter set with small satin ribbon bows in the trim -- so fancy! The room had white wicker furniture that actually matched and mirrored closet doors. 

In the 90s I still liked the country, antique style. I had another comforter set with mauve roses and vines. I remember lots of baskets and pictures of flowers and cute baby animals...


Later, I decided to paint my room sage. It was really more of a mint though, and after a year of it, the color completely grossed me out. To this day, if any color hints at that awful sage mint I have to change it. Right then. Finally, I painted my room a soft cream. It was pretty. I opted not to do curtains over my mini blinds. Instead, I accentuated the half-window with a scarf and old-world sconces. I loved the old world look... way too much. 

In college it was zebra print pillows and a khaki duvet cover with purple sheets (Go LSU!). Great choices until I saw the peachy-beige color of my dorm room walls. It clashed in the worst way. 

It's funny to think about all of those rooms. I spent so many hours there! It gets me thinking... what will I think of when I look back on my current style? 

So much of what I do is limited by my budget, but I also limit myself by playing it safe. When I chose that blue comforter set, I didn't doubt it. I knew what I wanted. I liked blue. Gosh I wish I could be that decisive now. I wish I didn't care so much what was in style, expected or in everyone else's homes. 

And come to think of it, I want to live my life more like that too. I want to go for the unexpected. Not worry about others' opinions. Just go with what I love. 

How about you? Do you remember all of your childhood bedrooms? Do you wish you could decorate and live life with more conviction?

I have a board on Pinterest called "Design with Guts." I hope one day, some of my rooms will look more like them. My life too. 


Wednesday, April 18, 2012

Chalkboard Paint on Kitchen Cabinets

The chalkboard trend... by now everyone has at least pinned one of these babies on pinterest. (Hopefully one from my etsy shop... hee hee) They're fun and so useful. I just love 'em.

A couple of months ago while finishing up a chalkboard project, I had a moment of brilliance... aka I got distracted. On a whim, I painted the inside of the cabinet doors on my pantry. I didn't sand or prime it. I painted the cabinets last year, so I knew it was a good surface. After two coats and about 15 minutes of work, I have a simple, hidden surface to jot down my weekly menu and grocery list. 


The best part: it's super convenient!

I have an iphone app to manage my grocery list, but many times that's too inconvenient. I end up forgetting what I was supposed to write before I can find my phone. I may be in the middle of fixing dinner and realize I need three things. I just jot it down (usually in my messiest handwriting) and add it on my phone later. The menu is great because I just open the pantry and see what meals options I have. 


Here's another shot of my gorgeous cabinet. I did organize it for these photos... in case you were wondering. :)

I buy my chalkboard paint at Lowe's, but I've also seen small cans of it at Walmart in the craft section. Just make sure you have a good surface for the paint to adhere to. I use a disposable sponge brush or roller and apply two coats.

*Before you use the chalkboard, "season" it by rubbing chalk over the entire surface and erasing it with a dry paper towel or cloth. This will make it easier to erase items.

Let me know if you give this little idea a try!


Wednesday, March 7, 2012

Repainted Foyer

If you're friends with me on Facebook, you know that a couple of weeks ago, I repainted my foyer... for the fourth time. The problem is that there is so much going on in the space: crazy black/tan patterned flooring, too many doors and chair molding.

I originally painted it yellow-gold on top and grey on the bottom. I liked the color combo, but it didn't flow with the rest of the house. So, on a whim, I took out my leftover gold paint and painted the bottom half. Better. 

I lived with that for a few months. On another whim, I whipped out some Valspar Belvedere Creme that was left over from a furniture project. I painted the bottom half again. Better still. It stayed like that for almost a year. 

I just wasn't feeling the yellow-gold. My living room is a greenish-bluish-grey, the kitchen is a darker blue-green shade, and the study is green. It was too much. My house felt choppy.

So, I started taping up swatches. I tried everything, but nothing looked right. Add the crazy floor tile and a chair rail... ugh! I knew what I had to do, but wasn't painting a room white considered chickening out? Seriously, out of every color in the rainbow, I couldn't find one I liked?

I hurriedly picked up seven swatches of cream/ivory/white at Lowe's while my monkeys attempted to escape the confines of the shopping cart. I selected Muslin Wrap by Valspar. Another trip with the monkeys yielded paint (in an eggshell finish) and a roller. 

Two days of naptimes, and I have a pretty, ivory foyer. I really love it. It's light and airy. 


I'm loving how my Valentine's flowers looked in there. I now want hot pink flowers in every room. 

Here's how it looks from the door. That's my great-grandmother's buffet. It's terribly beat up and scratched. One day, I will get around to refinishing it. My other grandmother gave me a 100-year-old frame that I'm going to have made into a mirror. It will eventually go in here.

Here's our new family sign. I like the way it turned out, but the letters are too dark. Being the perfectionist I am, I always find flaws in my own work. Still, I love the verse, Col. 2:7. 


I also have a chalkboard hanging in there. What do you think about painting the inside of my front door that same shade of blue-green? Too much? I just can't stop...


Here's the whole room. Sorry it's a little blurry. We're eventually going to replace the tile with the same wood that's in the living room. And that popcorn ceiling's gotta go. One thing at a time... At least I like the wall color!

Saturday, February 11, 2012

It doesn't take much to make me smile

I have two new things in my living room that put a smile on my face every time I walk into the room. I'll start with the biggie:


I made a slipcover, y'all! And I am so stinking proud of myself. Is it perfect? No way. But that's not what I was after anyway. I just wanted pretty.

Here's what I started with:

I found two of these Old Hickory wingback chairs at a garage sale a few months ago. I paid $40 for the pair. I originally thought I would reupholster them, but slipcovers seemed more practical. I followed Miss Mustard Seed's video slipcover tutorial here. It was not easy. I'd say I'm an advanced beginner when it comes to sewing. This was a challenge!

I used bleached drop cloths for the fabric. The slipcover cost about $35 in materials and took several long nights and nap times. But it was worth it.


What a transformation! I love my "new" chair. And I'm sure the next slipcover will look even better. 

The other reason I'm smiling is two brass candle sconces I found at an antiques shop.


They were $15 for the pair. I love them on either side of the TV. Now, I'm not sure what else to put up there. Suggestions?


Maybe I'm an old lady at heart, but I just love these. Or maybe I really am an old lady. I have about 20 gray hairs right in the front of my head... Ugh... I digress...

It really doesn't take much to make me smile. And when I find or make something pretty and inexpensive, I just love it even more. 


Sunday, December 18, 2011

Day 9: Sheet Music Wreath


It's day 9 of the 12 Days of Crafting. Today's project is a Sheet Music Wreath. I realize there are 100 tutorials for this on the web, but oh well. This was the first time I'd made one, and I will definitely be making more! These can also be made with books. The size of your finish wreath depends on the size of your paper. This one is big... probably 30 inches in diameter. 


MATERIALS:
Sheet music or other paper (I used an old organ book my Mamaw gave me.)
Glue gun and glue
Scissors
Pencil
Forms to trace your circle (I used a bowl and jar lid)
Exacto knife (not shown)
Foam board or other cardboard


STEP 1. Trace your outer circle onto the foam and cut it out. I ended up using a knife because it was so hard to cut through with scissors. Then, trace and cut your inner circle. You should have a doughnut shape. My large circle was about 10" in diameter. 

STEP 2. Make your cones. This takes some practice before you get the hang of it. I found it easiest to hold opposite corners, and cross one over the other. Take your left hand and smooth out the cone while you glue with your right. I glued in a couple of spots. I didn't worry about making these perfect. I just wanted them to be similar in size.

STEP 3. Attach your ribbon and start gluing. I used a stapler to attach my ribbon, but you could also use hot glue. Do this before you start gluing the cones though. To attach the cones, put a few lines of glue on your cardboard and stick your cone, overlapping the end by about 1/2". 


Here's what it looked like after one layer. For the second layer, I cut the paper in half. Put the glue directly onto the cone and set in place in the grooves of the first layer. (Hope that makes sense!) You could add a third layer, but I was happy with it at this point.


I hung mine over an antique mirror in my living room. It's not holiday decor, per se, but I think it's festive, and, most of all, understated. Here's another shot with the Christmas tree in the background.


Tomorrow's project is a holiday card holder, so be sure to check back! 

Friday, December 16, 2011

Day 7: Poinsettia Pillow


Today, I'm going to share how I made this cute Poinsettia Pillow. At first I wasn't going to do this project, because I didn't want to go to the store. But I actually had everything on hand. I was inspired Miss Mustard Seed's version, however mine is definitely different. 


MATERIALS:
About 3 pieces of ivory (or red) felt
1 piece of mossy green felt
1 piece of gold felt
Sharp scissors
Fabric glue
Linen or other fabric for pillow
Polyester fill 
Thread
Sewing machine (you could do it by hand though)

STEP 1. Cut out your pieces and your pillow. I did three leaves in green, three large white petals, three medium petals, four smaller petals and five gold circles. My large leaves are about 4" tall by 2 1/2" wide. I looked at my real poinsettia for inspiration. Don't worry about making it perfect. Real ones have many different types of leaves. 

For the pillow, I knew I wanted it long and narrow. Mine is 24" x 11". If possible, I suggest attaching the flower before you sew the pillow. 


STEP 2. Lay it out. You definitely want to get a feel for how the pieces look together. Start with the leaves, then the large petals in between, then medium and finally small. For the gold circles, think of a dice. 


STEP 3. Attach your pieces to one side of your pillow. I used Liquid Stitch fabric glue. I really expected to have to sew this on. I didn't think it would really hold. I had to go back after the first coat and reapply in places, but so far it's doing fine. I just applied the glue all over the felt pieces and pressed it onto the fabric. It took about 45 minutes to dry completely. 

STEP 4. Finish your pillow. I'm not going to go into detail about how to make a pillow. Basically, you put two wrong sides together and pin in place. Sew around the edges and backstitch over the ends, leaving about a 5" gap to stuff the pillow. Clip the excess fabric on the corners and turn it right-side-out. Once it's stuffed, had stitch the pillow closed. I actually used a combo of polyester fiber-fill and the stuffing from an old king-sized bed pillow... because I really didn't want to go to the store with all three of my monkeys. :)


And here it is on my couch. It really was a fun little project. I hope you give it a shot. Stay tuned for tomorrow's craft: Scrapbook Paper Garland.


Wednesday, December 14, 2011

Christmas Home Tour

I'm finally happy with my Christmas decorations, so I snapped a few pics to share with you. I ordered some ivory burlap from Hobby Lobby online, and it came in today. So, after a quick styling, I'm ready to share the results. :) Welcome to my house!


I went for a natural look this year. Because my twins are 2, I also had to make everything very kid-friendly. There are no glass ornaments on my tree, and nothing breakable was set out where little fingers could reach. I also hung ornaments that didn't "match" but were meaningful to our family.


Most of the ornaments on the tree were made by me or my kids. The tree "skirt" is just ivory burlap. I fell in love with the pretty gold star at Target. 

The tree is enormous -- 11 1/2 feet! My papaw works for a landscape company. The day we were going to get a tree, he called and offered us one. What a blessing! I can promise you, the tree we would have bought would not have been this nice. 


Last year, my mom bought me the stockings from Pottery Barn. I took a chance and hung them (with command hooks) by our never-used fireplace, and so far, the boys haven't pulled them down.


I kept the mantel pretty simple with a white poinsettia, ornaments in a glass dish, silver frame and black candlesticks. I added a pretty metal nativity set in one of the cubbies by my fireplace. Everything else stayed the same. 


And a beauty shot...


Here's a view of the living room. I'm going to share a tutorial for the poinsettia pillow soon. 


This is one of my favorite decorations... it's a Little People nativity. We've had fun acting out the Christmas story with the characters. It's also from Target. :)


Finally, here's the foyer. I hung the acorn wreath over the mirror for a natural holiday look. I also added an ivory burlap table runner, ornaments, metal trees and framed our Santa picture from this year.


So there you have it. Thanks for stopping by!

I'm also linking up to The Inspired Room's Christmas Home Tour here.


Thanks for stopping by Doing More Than Laundry!

I also write a blog about design and my furniture business:
The Little House. Check it out!